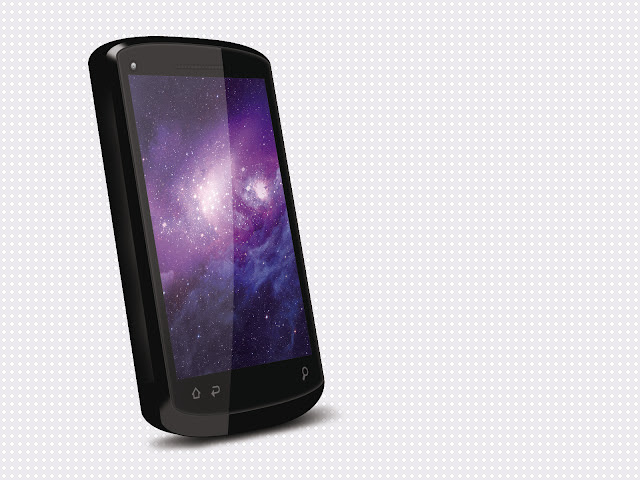
In this tutorial, we’ll design a realistic Cell Phone. The idea behind this tutorial is to teach you drawing cell phones smartly as it is not a rocket science. I hope you enjoy the tutorial and try it with your own stock imagery.
Download From www.JustAnArtist.com
STEP 1
Start by creating a file with a size of 1600×1200 pixels.STEP 2
Now Draw a Rounded Corner Rectangle in centre of your canvas with color of #0e0e0e.
STEP 3
Duplicate the Rectangle layer and slide a little to the right.STEP 4
Now draw a Rectangle for depth of body with a gradient from #272624 to #454545 and Place between 1st and 2nd Rectangle.STEP 5
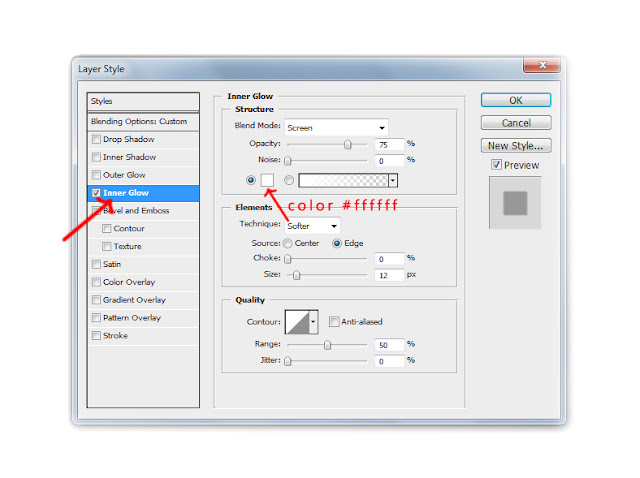
Duplicate the front Rectangle, resize and slide to right corner and apply inner glow with following settings
STEP 6
Draw another rectangle for LCD screen with a color of #242321.STEP 7
Now grab a wallpaper of your own choice above the LCD Layer and Alt+Click between layers to create a layer mask ( see through )STEP 8
Now draw rest of elements i.e buttons camera etc.STEP 9
Draw shadows for the body of Cell at top and bottom.STEP 10
Draw a gloss rectangle with opacity of 25% at top of LCD and cut it from right with Circular Marquee tool.STEP 11
Draw another rectangle for shadow and apply Gaussian blue by going to Filter > Blue > Gaussian Blur in the Main menu.Conclusion
That’s it, we’re done. The final product is shown below. Hope you had fun working on this project and learned something new! Thanks for reading!Download From www.JustAnArtist.com


No comments:
Post a Comment